Grout and Thinset Removal: Precision Mortar Raking Without Chipping Surrounding Tiles
To remove thinset without damaging tile, score and rake the perimeter grout joint completely down to the substrate using a dedicated diamond blade on a controlled grinder, isolate the target tile, and chisel inward toward the relief void rather than outward against neighboring finished edges. Eliminating lateral compressive force before mechanical mortar removal is the only proven method to prevent edge blowouts, corner fractures, and glazed face chipping.
You have probably lived this nightmare on a Monday morning: a homeowner drops a cast-iron skillet onto a hand-cast porcelain slab or custom rectified tile, and you get called in to do a "simple single-tile swap." You chalk out the perimeter, grab a cold chisel or a cheap hardware-store abrasive disc, and start popping the center. Three hammer taps in, a stray shockwave travels straight through the bonded mortar bed, and you hear that nauseating ping. The glazed corner of the pristine, adjacent forty-dollar-a-square-foot tile snaps off clean. Just like that, a two-hour surgical repair morphs into an unpaid, full-day demo job eating right through your profit margin.
Why the Old Way Destroys Adjacent Tile
Standard mortar demolition fails because it treats precision raking like slab demolition. Thinset mortar relies on tensile shear strength and continuous compressive load across adjacent tile edges. When contractors attack hardened mortar beds using standard multi-tool carbide rasps, hammer drills, or generic dry-cutting diamond masonry discs, three physical failure modes happen simultaneously: arbor runout, lateral vibration transfer, and severe thermal glazing.
Generic stamped-steel blades flex under lateral guide pressure. At high operating speeds, dynamic runout causes the blade core to dish and flutter sideways, directly impacting the precision-rectified edges of adjacent tiles. Furthermore, coarse sintered masonry segments generate excessive friction in narrow channels. The diamond bond overheats, dragging molten polymer-modified resins across the diamond matrix and glazing the cutting face completely smooth. Instead of shearing mortar cleanly, the blade hammers against the joint. That lateral impact travels into the surrounding tile assemblies, blowing out edges and breaking delicate sub-surface bonds.
From a jobsite economics perspective, relying on crude demo tools is financial suicide. A replacement tile costs money, but the real margin killer is unbillable labor. Re-chiseling broken tiles, repairing damaged waterproofing membranes like Schluter-DITRA, and running emergency supply runs will destroy your day's schedule. Precision raking demands surgical isolation, not brute force.
The Engineered Solution: Controlled Relief and Flush Mechanical Raking
Surgical mortar removal requires two mandatory phases: zero-contact joint evacuation and inward relief chiseling. To evacuate grout lines safely without touching surrounding edges, you need a dedicated diamond blade for grout clean out that maintains absolute core rigidity under side-load pressure.
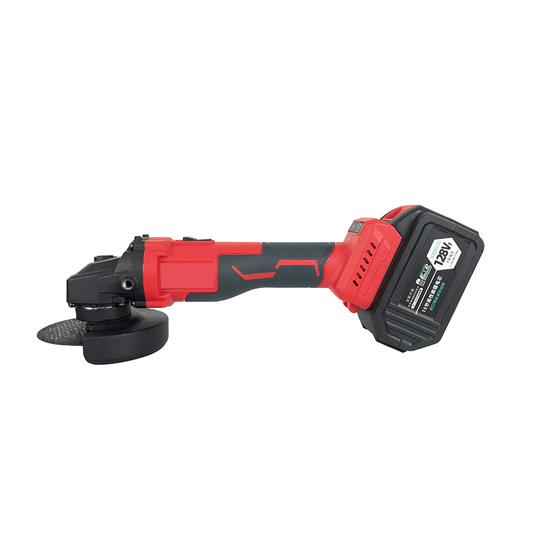
To clear narrow joints and undercut old mortar, mount a grout removal angle grinder setup with rigid lateral side-protection. Unlike standard sintered blades that wander, the RedhawkPro Turbo Wave Electroplated Diamond Wheel utilizes a high-tensile stamped steel core coated with exposed diamond grit across both face walls. This allows the tool to act as a precision thinset removal disc that slices through dense cementitious mortar while providing lateral grinding action to true up vertical tile sidewalls without micro-fracturing the glaze.
When preparing your grinder setup, lock in these field-tested operating parameters:
- Zero Lateral Prying: Enter the joint vertically at a strict 90-degree angle to the surface plane. Let the diamond matrix grind the mortar. Never tilt the grinder sideways inside the joint to pry stubborn grout loose; lateral leverage will bind the core and chip adjacent tile lips.
- Feed Speed and Light Passes: Execute controlled, multi-pass cuts rather than plunging straight to the substrate in a single pass. Take shallow passes of 1/8-inch depth at a time. This keeps heat dissipation constant and prevents resin glaze buildup along the diamond gullets.
- Dust Capture and Line Sight: Mount an OSHA-compliant angle grinder dust shroud with a clear sighting guide and depth-stop shoe. Capturing silica at the point of origin keeps the cut visible, preventing accidental wander into finished tile.
- Relief Geometry: Once the perimeter grout is completely raked out, score an "X" pattern deep into the center of the damaged tile. Chisel inward toward that central relief void. With the lateral compressive tension removed, you can replace broken tile without damage to the surrounding floor.
Jobsite Decision Matrix: Standard Demo vs. Engineered Raking
| Operational Dimension | Standard Oscillating Tool / Abrasive Blade | RedhawkPro Precision Diamond Raking System |
|---|---|---|
| Linear Cut Speed | Slow crawl (approx. 1–2 linear ft/min in hardened grout) | Rapid clearing (approx. 6–8 linear ft/min in dense mortar) |
| Tile Edge Quality | High risk of chipped enamel, face blowouts, and glaze spalling | Crisp, factory-clean edges with zero lateral impact damage |
| Tool Wear & Life | Rapid tooth burn-off, blade dishing, and resin glazing | High diamond retention with exposed side-cutting electroplated matrix |
| Jobsite Safety & Risk | High vibration fatigue, airborne silica dust, and substrate punctures | Rigid tracking, smooth motor load, and sealed vacuum shroud extraction |
| True Cost-Per-Repair | High (frequent blade swaps, cracked adjacent tiles, lost labor) | Low (single-pass cutting, reusable wheel life, protected tile integrity) |
Field Rules from a 20-Year Specialist
Treat mortar removal with the same discipline as finish carpentry. Over two decades in the field, these three practical guidelines have saved more high-end tile jobs than anything else:
First, monitor your flange runout before making a cut. Even the finest diamond wheel will chatter if installed on a warped grinder flange or dirt-caked spindle. Clean your arbor threads with a wire brush, seat the wheel flush against the inner flange, and test-spin the grinder without load. If you observe any axial wobble, replace the locking nut immediately. Even ten-thousandths of an inch of runout at high RPM transforms a clean cut into an aggressive micro-hammer.
Second, understand motor load and let diamond exposure do the work. Pressing down hard does not accelerate mortar removal; it slows motor RPM, drives up core temperature, and melts polymer additives directly over the cutting grit. If the blade starts to skate or glaze over dense, modified mortar, pause and dress the wheel immediately by running two quick passes through an abrasive dressing stick or a scrap piece of soft refractory brick. This strips away melted polymer and exposes a fresh layer of razor-sharp diamond crystals.
Third, never force a standard kerf blade into an ultra-narrow 1/16-inch grout line. Verify your grout joint width before spinning up the tool. For narrow lines, ensure your selected blade profile clears the space without rubbing both tile faces simultaneously. For technical application questions or custom substrate challenges, check out our technical support and contractor contact team.
Cheaping out on demo tooling doesn't save cash; it doubles your labor rate through broken tiles and botched repairs. Equip your crew with the jobsite-proven RedhawkPro Turbo Wave Electroplated Diamond Wheel and get through your next tile repair with clean edges, intact substrates, and protected profit margins.