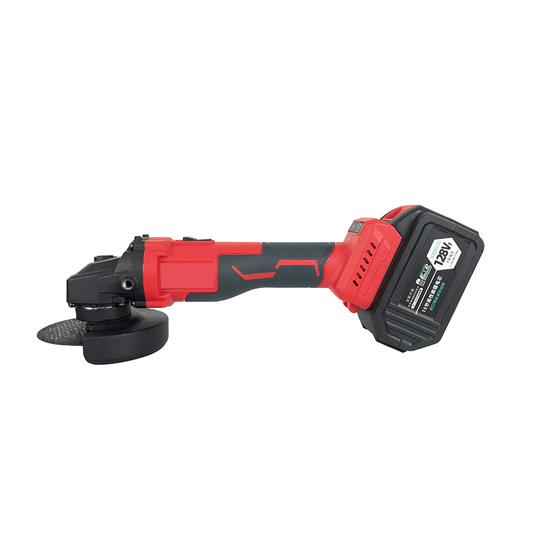
Chainsaw Blocking vs Angle Grinder Shaping: The Two-Stage Power Sculpting System
Choosing between chainsaw carving vs angle grinder tooling comes down to material removal volume versus surface precision: use a lightweight chainsaw for rapid stage-one blocking to strip heavy log mass to within an inch of your silhouette, then switch to an angle grinder fitted with dedicated shaping discs for controlled contouring, concave hollows, and transition blending.
Every seasoned woodworker has watched a promising four-foot white oak trunk turn into an unrecoverable pile of scrap because someone tried to muscle through the fine lines with a guide bar, or spent three agonizing hours cooking their angle grinder motor trying to hog out thirty pounds of green heartwood with a four-inch wheel. When you force a single machine to handle both bulk waste removal and refined surface geometry, you wreck your stock, blow out your bearings, and torch your daily labor margins.
The Mechanical Failure of the Single-Tool Approach
The physics behind log failure during rough-out always boils down to heat buildup, motor stall torque, and rotational clearance. An angle grinder spins between 8,000 and 11,000 RPM, depending on the tool chassis. If you try to force a grinder wheel three inches deep into end grain to take off green sapwood, the kerf pinches instantly. The disc stalls, friction spikes, and the wood fibers begin to glaze and scorch before the motor sheds heat through its cooling vents. You end up applying brute arm force to compensate for insufficient chip evacuation, causing arbor runout, bearing play, and violent kickback along the grain lines.
Conversely, attempting detailed facial features, hollow transitions, or smooth muscle flows with a standard timber bar turns into a gouging disaster. A chainsaw relies on dynamic chain travel around the nose sprocket. The moment you push the nose into an internal radius without adequate clearance, the reactive kickback zone grabs, tearing out massive splinters along the radial growth rings. This tearout runs deep beneath your finished dimensional line, forcing you to shrink the overall sculpture just to hide the damage.
From a jobsite economics standpoint, neither failure is acceptable. Labor running at sixty to eighty dollars an hour cannot be wasted babysitting an overheated four-inch tool on bulk log stock, nor can you afford to scrap hundreds of dollars worth of seasoned timber to avoid switching rigs. High-production sculptors use a disciplined two-stage power carving tools workflow: clear the gross volume with a dedicated saw, then cut the fine profiles with high-speed rotary discs. For a deeper breakdown on handling aggressive rotary forces without wrecking your wrists, read our field breakdown on preventing grinder kickback while carving wood.
Stage One: The Engineered Blocking Foundation
The heavy lifting belongs exclusively to stage-one roughing. The objective here is simple: drop waste timber in heavy blocks, establish the plumb reference planes, and rough in the anatomical masses without burying your nose bar into kickback zones. For dense hardwoods and green greenwood alike, you need a high-torque, balanced machine that gives you nimble control without the exhausting wrist drag of a sixty-cubic-centimeter gas saw.
The mechanical solution for establishing this stage is the RedhawkPro Cordless 10-In Chainsaw 21V. Its compact ten-inch bar and constant 21-volt brushless motor delivery allow you to shave slabs off dense trunks with immediate trigger response, avoiding the inertia whip common to bulky falling saws. In high-density oak or hickory, veteran carvers maintain a maximum single-pass relief cut depth of six to seven inches to keep the chain speed constant and clear chips out of the guide groove.
Once your silhouette is defined and your block boundaries sit roughly one to one-and-a-half inches proud of your layout lines, shut the saw down. Forcing the chain into tighter radii only invites gouging. This is the exact transition boundary where you step away from the bar and pivot to rotary wood sculpture technique.
Stage Two: Refined Contouring and Transition Blending
Transitioning to the grinder stage shifts the focus entirely to chip management, surface contouring, and tangent blending. To sculpt deep muscle forms, dish out bowls, or contour round furniture transitions, you need an aggressive, curved cutter that rides over grain variations rather than digging into them.
Mounting a wheel like the RedhawkPro Concave Wood Carving Disc onto a standard 4-1/2-inch or 5-inch grinder transforms the tool into a smooth surface shaper. The concave profile presents its tungsten carbide teeth at an oblique angle to the log surface, shearing fibers progressively rather than slapping the wood face-on.
For maximum operator control and minimal surface washboarding, keep the grinder oriented at a 10 to 15-degree attack angle across the log face. Let the tool RPM do the cutting; never lean your body weight into the arbor flange. Sweeping passes from the high points down into the hollows keep the teeth clear of resin buildup and prevent burning the grain. When leveling broad high spots or planing flat faces before detailing, swap over to the RedhawkPro 4-1/2 Flat Wood Carving Disc to establish true reference planes without gouging hollows. For an exhaustive breakdown on selecting between flat, curved, and bevel cutters across different log profiles, check out our guide on flat vs curved wood carving discs.
Jobsite Decision Matrix: Chainsaw vs Grinder Carving
Choosing the wrong machine at the wrong stage blows out project timelines. Use this field matrix to establish clean task boundaries:
| Dimension | Stage 1: Chainsaw Blocking | Stage 2: Grinder Shaping |
|---|---|---|
| Cut Speed | 12 to 18 sq in/sec bulk waste offload | 1.5 to 3 sq in/sec surface profiling |
| Edge Quality | Rough-sawn kerf with coarse chip tearout | Clean sheared face ready for medium rasps |
| Tool Life | 15 to 25 rough trunks between chain touch-ups | 40 to 60 running hours per tungsten carbide wheel |
| Safety / Risk | Upper nose kickback hazard and binding risk | High-speed wheel bounce and chip deflection |
| Cost-Per-Cut | Lowest cost per pound of bulk timber removed | Lowest cost per finished dimensional square inch |
Veteran Field Rules for the Two-Stage Workflow
Rule 1: Never carve with a dull chain or resin-caked teeth. A dull chain forces the operator to push the bar, bending the guide rails and causing diagonal cuts that dive into your target contour. If your chainsaw stops throwing matchstick-sized chips and starts throwing fine brown dust, take it off the log and dress the cutters. The same mechanical rule applies to grinder discs: clean out pitch and sap using a brass wire brush and citrus solvent before friction glazes the carbide edges.
Rule 2: Respect the 1-inch transition boundary. If you have more than one inch of excess material standing between the log surface and your final profile, leave the grinder on the bench. Chewing down heavy bulk with a rotary disc wastes tool life and overheats the gearbox. If you have less than one inch of stock remaining, step away from the chainsaw; chain slop and bar bounce will gouge past your finish line before you can react.
Rule 3: Match side-handle ergonomics to rotational torque. High-speed carving generates substantial lateral gyroscopic force. Always run your grinder with an auxiliary side handle mounted on the side matching your sweep stroke. Inspect arbor flanges for any runout or debris before tightening the lock nut; even a few thousandths of an inch of wobble at 10,000 RPM will ripple your timber surface and induce nerve fatigue in your hands within minutes.
Stop Burning Labor on Mismatched Tooling
Chasing a finished wood sculpture with only one tool is a losing battle against physics. Cheap, off-brand discs crack under jobsite stress, and underpowered, poorly balanced chain systems leave you fighting the wood instead of carving it. Equip your bench with the right tool for each phase of the cut.
Lock in your primary roughing gear with the RedhawkPro Cordless 10-In Chainsaw 21V, outfit your angle grinder with the full wood carving disc collection, and check out our team at the RedhawkPro story page to see how our gear is built for professional durability. Cheap tools double your labor every single time—build your setup around field-tested engineering and let the chips fly clean.